Backyard Nature

Nature Photography
by robin hindle

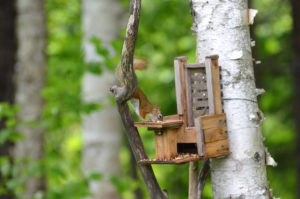
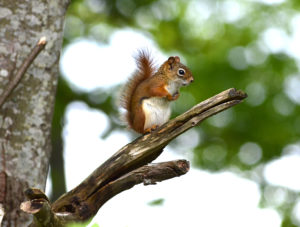
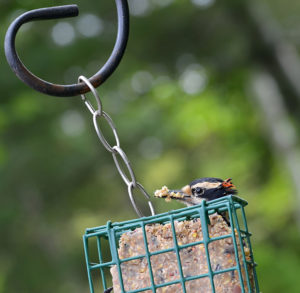
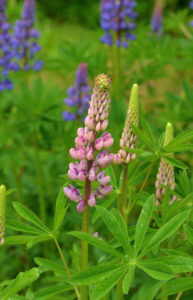
Today was a cool cloudy day and in spite of that I decided to have coffee on the deck. As I sat there I noticed how beautiful everything looked. There were birds, squirrels, green grass and beautiful flowers. So I took my camera and started taking pictures. I used my Nikon D5100 with the AF Nikor 80-200 zoom lens. Everywhere I looked was like magic. So serene and peaceful and yet activity all around with wood peckers, blue jays, humming birds, nuthatch and squirrels. Well just one squirrel of whom is named Earl. Yes I name all the animals that come into my yard. Earl the squirrel, jay the blue jay, woody the wood pecker although there are two different wood peckers, one is a downy and the other a hairy. Also the northern flicker (Flick for short) is also of the wood pecker family. One of which came for a visit but I didn’t get a photo. Hummy the humming bird, and last but not least the Nuthatch of which I have yet to think of a name. Most of the photos are taken from my deck except for the flowers. The lilacs are finally in full bloom after such a cool spring and the lupin are just coming into bloom now.

So here are a few pictures of my backyard nature. Some of the photos are a tad blurry but lovely creatures just the same. If you want to see the info on each photo press the “i” at the bottom of the image. Enjoy.

On another note, I am thinking of once again featuring artists and photographers. Preferably Canadian or local Nova Scotian. If you know of anyone whose art you would like to see promoted let me know and I’ll contact them and get the ball rolling. I will feature one artist and one photographer a month. So please send me your picks on who you would like to see for my next feature.

Colours of Spring

Spring is just about over and I have decided to share a few of my favourite photos from the season. Some are representing the beautiful colours of this time of year and others not so much. All of the photos are taken in my yard. I could have gone out and investigated all of New Minas for a multitude of the colours and sites of spring but I found such abundance of it in my own yard, I decided to stay home and take advantage of it. I hope you enjoy these photographs as much as I enjoyed taking them.

Earl

Once again, it’s been ages since my last post. I have decided to share with you some photos taken throughout the spring, summer & fall. This will be done over several posts in the next few weeks.

For my first post I’m going to share Earl with you. Earl is our resident squirrel. I think we get the same one most of the time, but I know there are a few more in the neighbourhood that come around as well. They too are known as Earl. There are 2 sets of photos, taken at different times and with different lenses.

The first 5 photos were taken midsummer, late afternoon, using a Nikon D5100 camera (this is used for all my photos) and the AF NIKKOR 80-200mm 1:2.8D lens. The camera is only a few years old with such settings as auto-focus and a myriad of other settings. The only reason I mention this is because the lens was originally bought for a much older less automatic camera and I don’t have the option of auto focus available. The last two photos were taken with the same camera but a different lens, the AF NIKKOR 18-55mm 1:3.5-5.6G. This can be used as a totally automatic lens, auto focus, f-stops, shutter speed and ISO, which I took advantage of in taking these two photos. I found the quality of focus wasn’t quite as good as when I used manual focus, like in the previous photos and I couldn’t get quite as close up a photo as I would have liked. That being said I love the positions I got of the squirrel in with these photos compared to the others.

So what do you think Earl’s story is?
Does he/she come only to us or does he take advantage of other bird feeders in the neighbourhood?
Does he get chased away from other homes or is he/she as welcomed there as he/she is here?
How far does he come to partake in our feeder?
Does he/she have a brood back at the homestead?
Do the birds like sharing their feeder with Earl?
If you can think of a short story to go with these photos send them to me and I’ll share the best stories. I’d love to hear from you.

A Fairy Book – My Process Using Pencils & Computer

Once again it has been eons between my posts. I thought I’d take you through a process I am doing in making drawings for my fairy book. This is not a lesson, it’s just the way I am producing these drawings.

I’m using mixed media involving pencil drawing and computer colouring. I want to apologize for the low quality photos; they were taken with my tablet.

I start with a sketch, of which I don’t have to show, but none the less that’s where it always starts. This drawing is of the Fairy Keeper and his pet. I haven’t come up with names for the keeper or his pet yet but the pet is an RTC (really tiny cat). Of course you’ll notice that the man is smaller than the cat which means he is also quite tiny.

The entire drawing is drawn with an HB graphite pencil. Once I’m satisfied with the drawing, sometimes that’s 2 or 3 or 4 drawings later, I begin the process of shading it. Each type of shading requires a different shade of pencil. As you probably already know there are many shades or hardness of pencils such as H (1, 2, 3, 4, etc), B (1, 2, 3, 4, etc.) and F. You also have HB which I use to make most of my drawings. I use the H pencils for my lighter shadings and the B’s for the darker shadings. As I’m shading with the pencils I’m also using a stump or tortillon to blend it. There’s a good explanation of the difference between these two smudging tools at this web site—Pencil Drawing – Blending and Shading – Learn to blend and shade your drawings with JD Hillberry. I must admit, after watching the video I realized I wasn’t using these tools in an entirely correct way, but I did get the desired effects I was looking for. There’s also another web site I found to be quite informative, Rapid Fire Art 

Fairy Book artwork from begining

Once I’m finished the shading, I scan the drawing at 600 dpi grey-scale. I find this setting works best for my purposes. Next, I open it in Photoshop and the first thing I do is select Image, mode then RGB so I can add the colour. Then I tweak the drawing a bit using the levels adjustment to bring out a little more detail in the lines. This can also be done during the scanning process, but I find it works better in Photoshop. Now the process of colouring begins by adding a new layer and naming it. For example, I will make a layer for face or skin tone. Next I go to my foreground colour picker to choose a suitable colour for my skin tone. For the Fairy Keeper I chose a medium pink-orange tone. Using a soft mechanical pencil brush, I begin adding colour to the face. While adding the colour I change the layer blending to “Colour Burn”. The layer blending is different for other parts of the drawing depending on the effect I’m looking for. For instance the clothes are done using a “Linear Burn” instead of the “Colour Burn” to give the colour a little more intensity. I also use “Overlay” on occasion. I will do each part of the face on a different layer then make a new group layer from selected layers and call it Fairy Keepers face. That way if I decide to change the colour of his eyes I can just go to the face group, find the eyes layer and change the colour. It’s also helpful using groups to keep the layers list from getting too long. From here I just do each part of the drawing adding layer after layer until I’m finished.  I used some special brushes to make the grasses and bubbles. I also added a couple of my individual fairies to this drawing of which I went through the same process to colour. One on the roof and the other behind a blade of grass. Now I’m finished colouring the drawing.

For the last thing I open a template that I’m using for the frame around each of the drawings. Next I will go back to my finished drawing and flatten the layers and then drag it over to the template, size it to fit the square and change the outside colour of the square to match with my drawing. That’s it I’m done. I make a glossy print and put it on the wall with the rest of the fairy work I have done so far then go to work on the next drawing.

As I said at the beginning, this is not a lesson. I don’t always do things by the book where art is concerned, sometimes it works and sometimes it doesn’t, but I learn a lot with each endeavor and I really enjoy what I do.

Don’t forget to check out Islandhosting if you’re looking for a good web host. I’ve been with them now for over 15 years and they’re the best. Islandhosting techs are always helpful when you’re having problems especially with WordPress sites. Click the link below to check them out.

ihlogo-f56e00--300-

Canadian Artist of the month Erica Messing

I know I haven’t posted anything in quite awhile but I’ve been in the middle of a cross-country move and working without my trusty computer. Hopefully I’ll be up and running normally again in a short while. In the mean time I’d like to take this time to re-feature a painter from BC. I was recently given a piece or her art and absolutely love it. Her name is Erica Messing. You can see what she has to offer and read all about her at www.ericamessing.com. I hope you enjoy her work as much as I do. Here are just a few of her works.

thetis-island-arbutus-edited Giant-edited IMG_0044_edited-1-150x150 Parkade-Vistas-edited-1-150x150